31 December 2018

DSP Mobile: Observing Equipment

Welcome back from the holidays! Our story continues ...

Your equipment and observer information can be added into Deep-Sky Planner Mobile Edition (DSPME) so that you can review the metrics of your complete setup - total magnification, field of view (for imaging & viewing) etc. The equipment information is also used by the visibility model when it calculates a prediction of whether you can see an object.

[Note: Screenshots for this post were made on a 9.7" iPad tablet with the Regal Blue app style.]

Owners of the Desktop Edition can export their equipment and observer data to files, and transfer them to a cloud service. These files may be imported into DSPME using the Cloud Import feature as described in a previous post.
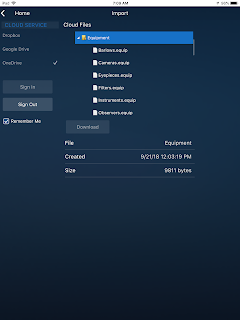

Import equipment from Cloud
Important:
Entering equipment and observer data directly into DSPME will be available in a future release.


Once equipment data has been transferred to DSPME, use the Equipment feature to select your combination of equipment. Selections are indicated by the checkmark; the summary of the equipment combination is shown in the right pane.

Equipment selections

The selections made in Equipment are used to predict an object's visibility when the plan is opened. The data item Vis Pred shown below is the result of the visibility model calculation. Note that the visibility prediction applies only to visual equipment combinations. No prediction is calculated for imaging combinations.

Visibility Prediction shown in a Plan

Next time, we'll look at the Conditions feature which is also required for the visibility model to predict whether you might see an object.
17 December 2018

DSP Mobile: Observing Locations

Any astronomical application must use the observer's location to produce accurate calculations. Deep-Sky Planner Mobile Edition (DSPME) is no different, and it provides 3 ways to set your observing location.

[Note: Screenshots for this post were made on a 9.7" iPad tablet with the Nightvision app style.]

Provided Locations

Over 400 locations ship with DSPME. You can browse the list and choose a location to be your observing location. If you need a location that is not provided in the database, you can add it by importing a file, or you can add one manually.

Import Locations

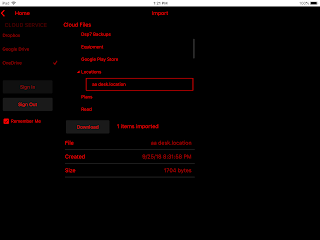
To import locations, you export locations to a file in Deep-Sky Planner Desktop Edition and store it on a Cloud Service. Next, you import the file using the Import from Cloud feature. The locations file is downloaded to your device and the locations in the file are imported into the app's database. Locations with duplicate site names are not imported.

Import from Cloud: Adding locations by importing

Enter Manually

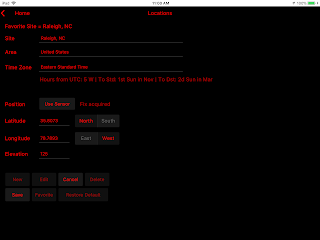
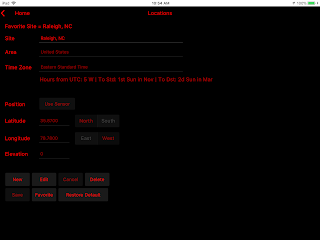
To add a location to the database manually, use the Locations feature. You can add a New location, Edit an existing one or Delete an existing one.

Add or Edit a new location

If your device has location services (network location or GPS), you can read location information from the sensor and save it to a location.

Use location services - network info or GPS
If you need to revert to the original set of locations that shipped with DSPME, you can Restore Default so that you don't have to uninstall and reinstall the app to get a clean database.

10 December 2018

DSP Mobile: Filtering & Sorting Plans

We continue where we left off in the previous post - exploring the plan window. Deep-Sky Planner Mobile Edition allows you to filter and sort an object listing by several criteria. These functions are accessed on the Filters and Sort tabs of the Plan window, respectively.

[Note: Screenshots for this post were made on a 9.7" iPad tablet with the light Wedgewood app style.]

Filtering

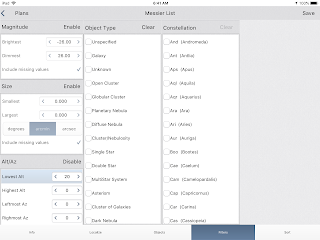
Like the Desktop Edition, you can filter the listing of objects in a plan by several criteria. This does not remove the objects from the plan: it simply hides them in the list. The filtering options include magnitude range, size range, altitude and azimuth in the sky, constellation and object type. Note that the latter two options allow you to select multiple items so you can show objects in 3 constellations for example. The screenshot below shows a filter on altitude where an object must be 20 degrees above the horizon or more to be shown in the list.

Filters: Filtering by altitude

Sorting

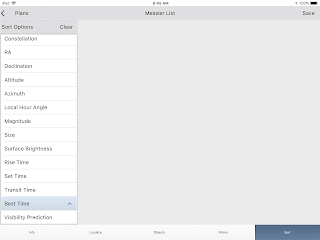
Many options are included for sorting the list of objects. You can specify sorting on one or more data items, and you can specify ascending or descending sort direction for each. In the attached screenshot, we sort simply by the Best Time to view an object in ascending order.

Sort: Sort by ascending best time to view

Putting it all together

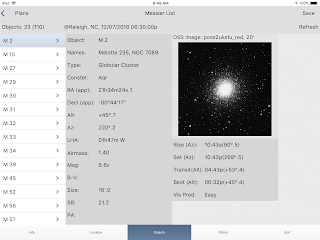
The Messier List plan is shown below with a typical use case for an observer. It shows objects above 20 degrees in the sky and sorted by ascending best time to view. This is accurate for the time and place of observation, so it effectively tells us which object to view next and the best order to view those that follow.

Objects: Object list sorted and filtered

03 December 2018

DSP Mobile: Viewing Plans

Once a plan is stored on your device, you can open it and view it. As with Deep-Sky Planner Desktop Edition, you can set a time and place for the plan, and filter and sort the listing by several criteria.

Setting Time and Place

Astronomical calculations require a time and a place to produce accurate results. The Localize tab of the Plan window provides these functions. You can select your location from the database and the date/ time for your observations as shown below. There are several options for calculating special times of day (sunset and so forth) for the location on the chosen date. You may also download images for objects in the plan from Digitized Sky Survey servers.

[Note: Screenshots for this post were taken on a 10" Android tablet with the Charcoal Gray app style.]

Localize: Location, Date/ Time, DSS Images

Viewing Object Data

Once you have the correct location and time set for your observations, you can view the Objects tab to view object information.

Objects: Object selection and detailed information
The Objects tab is where you find the detailed information for each object in a plan. Some of the data is static and stored in the plan file, but some is ephemeral - calculated for the time and place of your observation. This means that data like Altitude and Azimuth are calculated (and refreshed) as you work. Visibility modeling is also available so that you have an assessment of whether you can view the object given your equipment and conditions.

Filtering and Sorting the plan are important features that will be covered in our next post. Stay tuned!