A
Deep-Sky Planner user has contributed a method for creating a highly accurate horizon model for his suburban imaging location. The location has many obstructions that often interfere with imaging projects. Knightware thanks Deep-Sky Planner user Mark L. for contributing the following method.
At your observing location, set up a camera with a wide angle lens on a tripod. I used a DSLR and an 18mm lens. Make sure the date/time is set correctly on the camera.
Level the tripod, then set the altitude of the camera so that the local horizon can be seen in all directions. This makes the process easier since you don't have to readjust the altitude on each shot.
Determine a proper exposure time. I used 10 seconds at f/2 and ISO 800 in a fairly light polluted area (NELM 4.8). I got magnitude 5 and 6 stars with these settings.
Take an exposure, then move the azimuth of the camera about 30 degrees and expose again. Do this until you have covered the entire horizon around the camera's location.
At your computer, start up your planetarium program
setting the date/time to match the photos you just took. I used
TheSky6, but other planetarium programs can also be used.
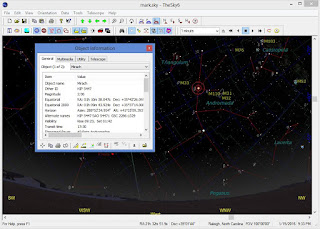 |
| Star information from TheSky6 |
Examine each photo, looking for a star that can be seen just above key points on your horizon. Find that star on the planetarium program. Click on the star to get the azimuth and altitude, then record these values using a plain text editor such as Notepad.
It is important to record the data in azimuth, altitude order with a comma separating the values because this is the format that Deep-Sky Planner expects. TheSky6 produces data in degrees, minutes, seconds format, so I wrote a script that turns the data in the text file into decimal degrees format for Deep-Sky Planner.
Python scripts are available to convert the data taken from TheSky (either TheSky6 or TheSkyX) to Deep-Sky Planner format. You can download these and sample input and output files at
http://www.knightware.biz/community/public/dsp6/kb/article-31.htm
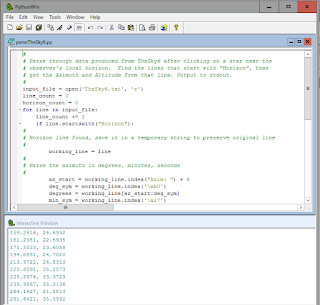 |
| Python script that converts data from TheSky 6 |
Repeat the examination process for as many points as possible around your horizon. The more points you record, the more accurate the model.
Import the list of Az/Alts into Deep-Sky Planner. Open the location in the Location Manager that you want to attach the horizon model to in the Location Editor. Click Import to open the Horizon Model Import dialog box. Choose the Input File that contains your horizon model data, choose Comma Separated Azimuth/Altitude format, and enter a name for the new model. Click Import to pull the horizon into the Deep-Sky Planner database.
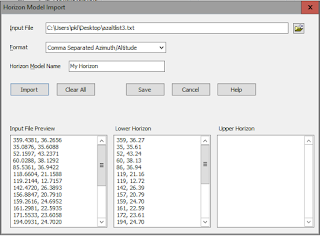 |
| Horizon Model Import dialog box |
Save the original data file or Export the horizon model to a .horizon data file using the Location Editor in case you need to import the model again in the future.


